KS2 Design Technology Project : Personal Protective Equipment

Photo Diary
Year 5, Woodgate Junior and Infant School, Birmingham
We started our project by finding out about personal protective equipment in everyday life. We looked at cycle helmets, swimming goggles, oven gloves and many other items of protective equipment.
Firefighter Jim McCulloch from West Midlands Fire Service visited our class. He brought with him his personal protective equipment. He told us what the equipment is made of and how it is designed to protect firefighters from heat, smoke, flames, electricity, water, chemicals and dangerous buildings.
We tried on the helmet. It is strong enough to protect the head from falling debris.
The visor on the front of the helmet protects the face and eyes.
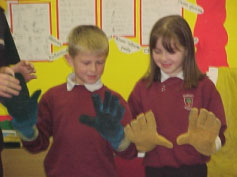
The gloves are made of several different materials. The outer layer is pigskin which is soft and pliable. Inside there are layers of waterproof and fire resistant materials.
We looked at the firefighters' boots with steel toecaps and tried on the jacket and trousers which are waterproof, fire resistant and have reflective strips.
Firefighter Jim then showed us a video about how fires start in the home. We learnt about smoke alarms and fire escape plans We practised what to do if our clothing catches fire - the Stop, Drop and Roll technique.
For homework that night we became Junior Fire Inspectors and we completed a West Midlands Fire Service "Fire Safety Starts at Home" checklist to complete with our families.
Next we went to visit Woodgate Fire Station, a short bus ride from our school. Jim introduced us to the firefighters on duty who showed us more PPEs that we had not seen at school.
We looked at the breathing apparatus which contains compressed air.
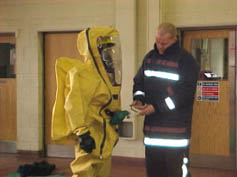
We also saw the special yellow chemical suits which completely cover the firefighter and even the air cylinders. These suits are difficult to put on and the firefighter was helped into it by the others. We could see how well the reflective strips show up on the standard jacket and trousers.
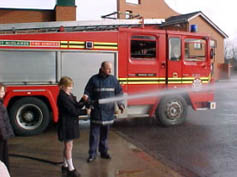
We had a close look at a fire engine to see all the different equipment it carries and when and why it is used. We saw a steel winch cable which is used for pulling crashed cars out of ditches. There are special reinforced gloves for this job to protect firefighters from friction burns and metal splinters. We learned how to use the water hoses.
Back at school we talked about all the things we had learned about firefighters' PPEs. Next, we started work on designing and making PPEs ourselves. We decided to work on protective gloves. We tried on lots of different gloves to look at their properties and what they are used for. We investigated gloves designed for work in the home, the garden and in different industries. The BBC sent us an oven glove from Ready Steady Cook.
We tried to use sticky tape while wearing glaziers' gloves.
We tried to fasten shirt buttons wearing a pair of industrial gauntlets.
Jim had explained to us that gloves have to be pliable as well as protective so that firefighters don't lose their dexterity and can still use complex equipment with their gloves on.
We carried out a dexterity investigation. We all chose a different pair of gloves from our collection and performed a series of tasks. We had to record how easy or difficult the different tasks were and compare our results with our friends and with the 'control' who did the tasks with no gloves on.
Dexterity Investigation (PDF 18kb)
We also tried to thread a needle, to read a newspaper, to tie shoelaces, to undo a zip and many other tasks while wearing different types of gloves. We discussed how the different glove designs and materials affected our dexterity.
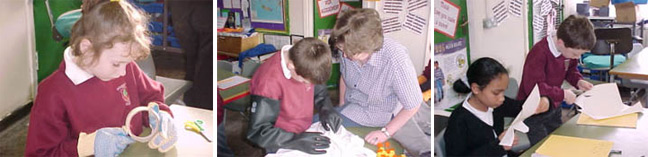
We examined the construction of commercially produced oven gloves, disassembling them to separate the casing, wadding and lining. Next, we began work on designing our own protective oven gloves. We first needed to make a paper prototype. We drew the shape of our oven glove on a piece of folded paper and then we carefully cut out the shape.
Once we had stuck the two sides together, we tested the size to make sure it would fit a child or an adult. From this prototype we made a paper pattern so that we could cut out the different fabrics for the outer casing, the thick, protective wadding and the inner lining.
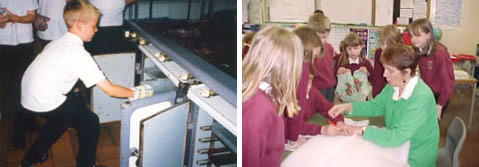
Once we had sewn all the layers together to make our oven gloves, we tested them in the school kitchen by carefully lifting hot cooking trays out of the oven.